
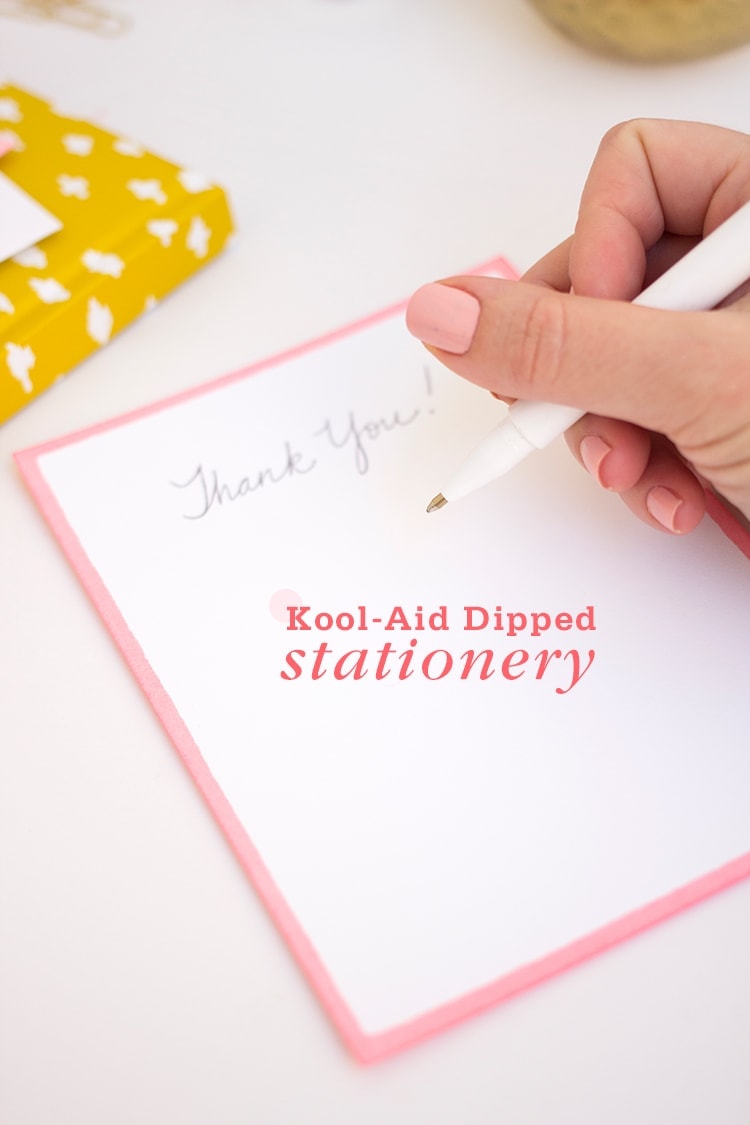
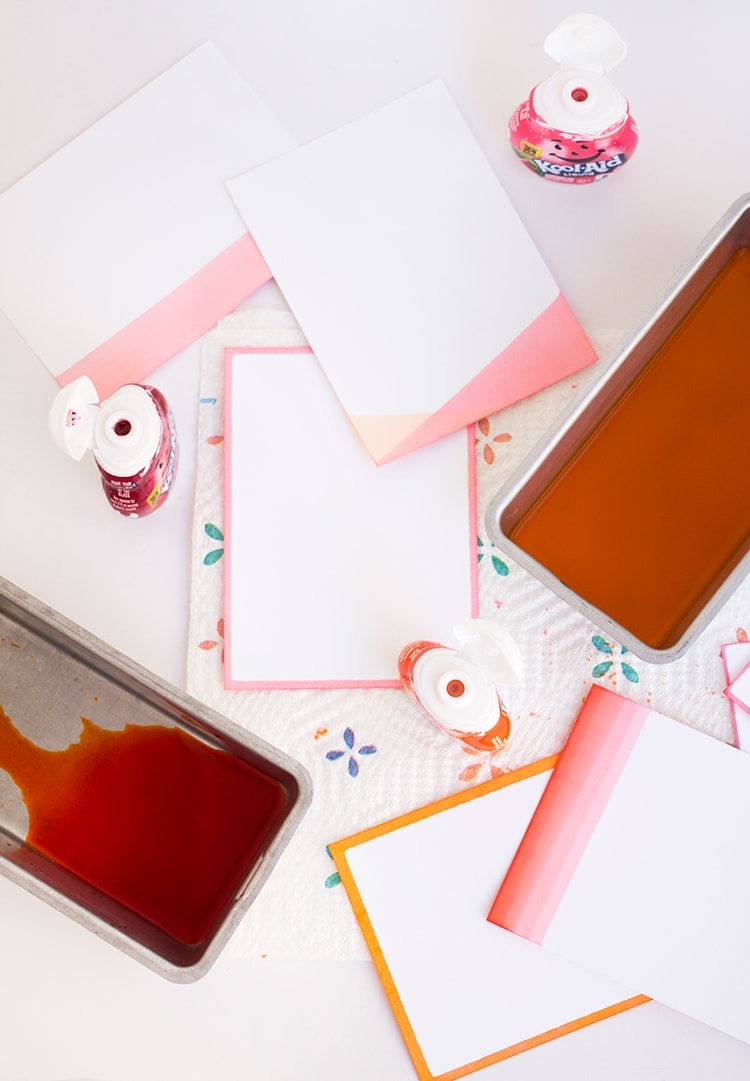
I've found my new favorite craft supply and its name is Kool-Aid! Let me explain: I've been meaning to make some simple-custom stationery as one of my goals this year is to write more handwritten notes. So I picked up some plain 100% cotton white note cards and envelopes at Paper Source and headed to the grocery store for my "paints."
Originally I planned to pick up a few packets of the original Kool-Aid powder to try them out as dip dyes. I figured all of that food coloring would make some pretty awesome stationery. What I found was that the variety of flavors (and therefore colors) was much broader in the liquid Kool-Aid then in powdered. Has the entire world turned to the easiest solution? I mean how hard is it to mix a pitcher of water and a packet of Kool-Aid power? Says the lady who would rather send a text than sit down and write a quick note on paper.

Well, it turned out that the liquid Kool-Aid was a breeze to use as dye and allowed me to control the color intensity much easier than mixing powder and water. So, I take back all of those judgemental things I said about liquid Kool-Aid...am I forgiven Kool-Aid man? In the end I was so happy with the way my note cards and envelopes looked that I shot a tutorial. I sure hope you will give this craft a try! It's easy, fun and smells good too. You can't say THAT about most craft projects.
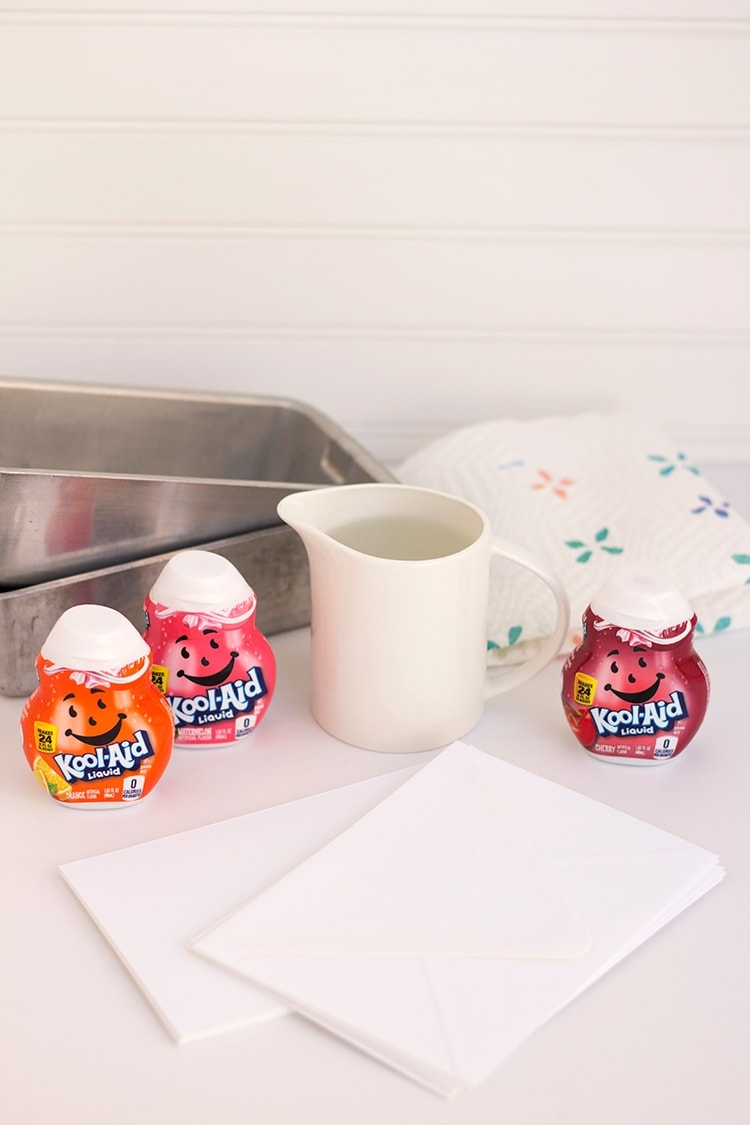
You Will Need:
white 100% cotton paper note cards and envelopes (A-6 or A-7)
paper towels
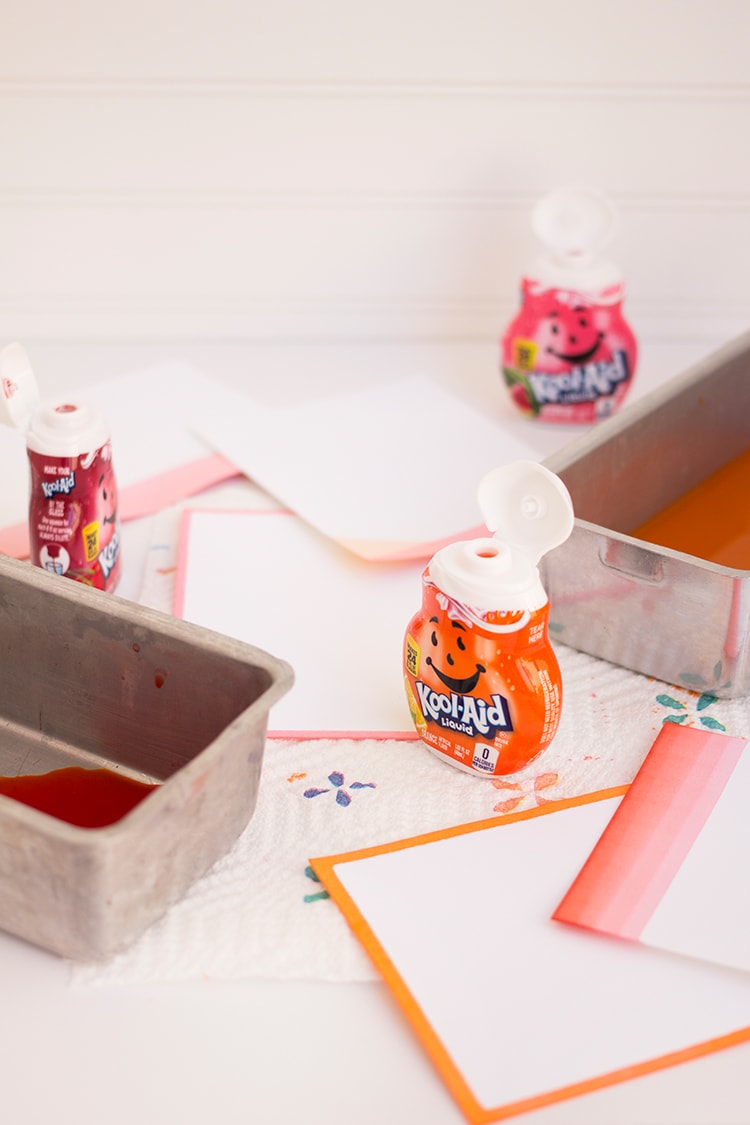
Kool-Aid Liquid in a variety of flavors (I used orange, watermelon and cherry)
water for diluting
trays or pans for dipping
cooling rack for drying
Here's how to create ombre note cards:
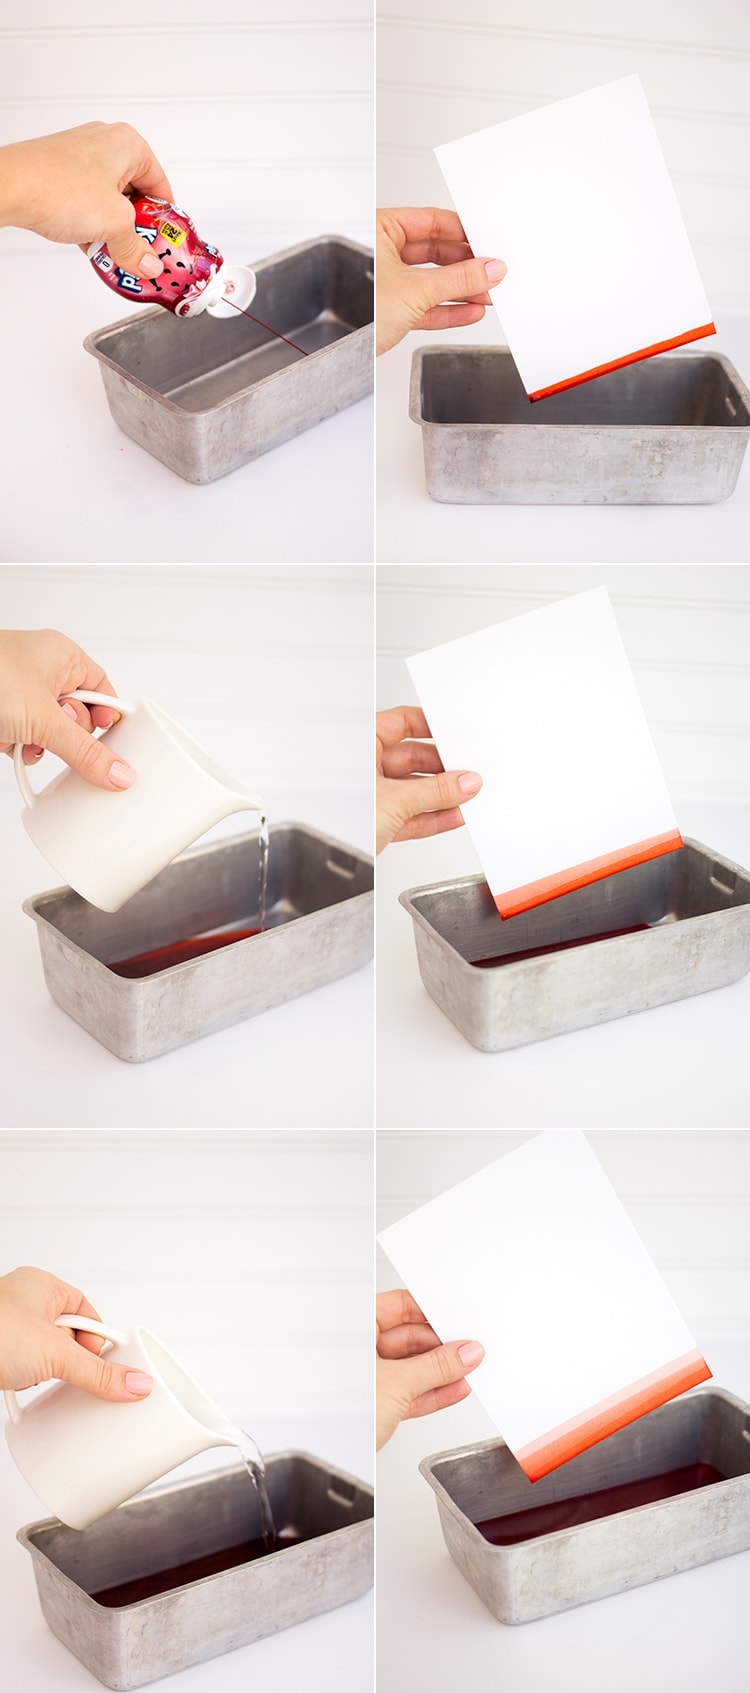
1. Squeeze a generous amount of Kool-Aid Liquid into a pan. You will need enough to dip the side of your paper in for your first band of color.
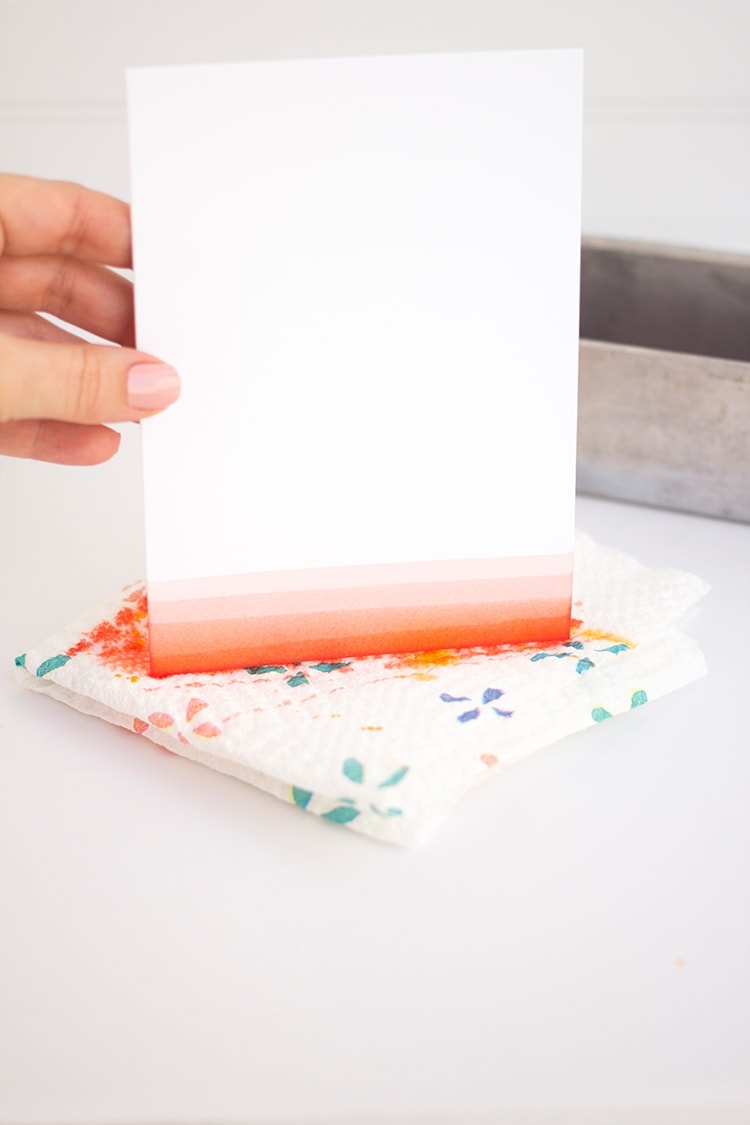
2. Dip paper quickly in the liquid and remove immediately. Blot on a paper towel to avoid drips.
3. Dilute Kool-Aid Liquid by 50% by adding water.
4. Dip paper a second time quickly in the liquid to create the second band of color. Remove immediately and blog on a paper towel.
5. Dilute Kool-Aid Liquid by 50% by adding more water.
6. Dip paper a third time quickly in the liquid to create the second band of color. Remove immediately and blog on a paper towel.
7. You can continue to dilute, dip, blot and repeat as many times as you wish. Then dry on a cooling rack or paper towel.
The ombre is gorgeous but I also really like the look of a simple watermelon-pink band at the bottom of my note cards and envelopes as well as a thin edge of color around all four sides of the cards.
But get creative! You can dip, double dip, add a drip, mix it up. You really can't go wrong with this tasty project!

photos by Leah Bergman


ddl275 says
Great idea, do you need to let the edge dry before you dip another side of the paper?
Leah Bergman says
I didn't let each edge dry but I did blot the edge just a little on a paper towel so that there wasn't any dropping!
Regina says
This is such a pretty, original & easy diy, and I love it.
Leah Bergman says
Thank you so much Regina! I hope you will give it a try. It's a fun project to make. 😉
inkstruckstudio says
This is a really good idea. It's simple yet makes a statement. Pinning this to try out sometime later. Thanks for sharing:)
Leah Bergman says
Thank you so much! I'm sure you will have a blast trying this project.
Miranda says
So crafty and cute, and I just adore the finished product! I do want to tell you, though, that "stationary", with an A, means "not moving" -- as in "a stationary bike". Writing paper, envelopes, and the like are "stationery", with an E. 🙂
Leah Bergman says
Oy vey! My terrible spelling strikes again. 🙁 Thanks so much for catching this...I'm off to change it now. Happy Weekend!
sharon says
🙂 Lovely idea! I will try it ASAP!! Thanks for sharing, Leah! May God bless you in all your endeavors!
Timia Lewis | exodus treasures says
it's been more than a year and these are still great.