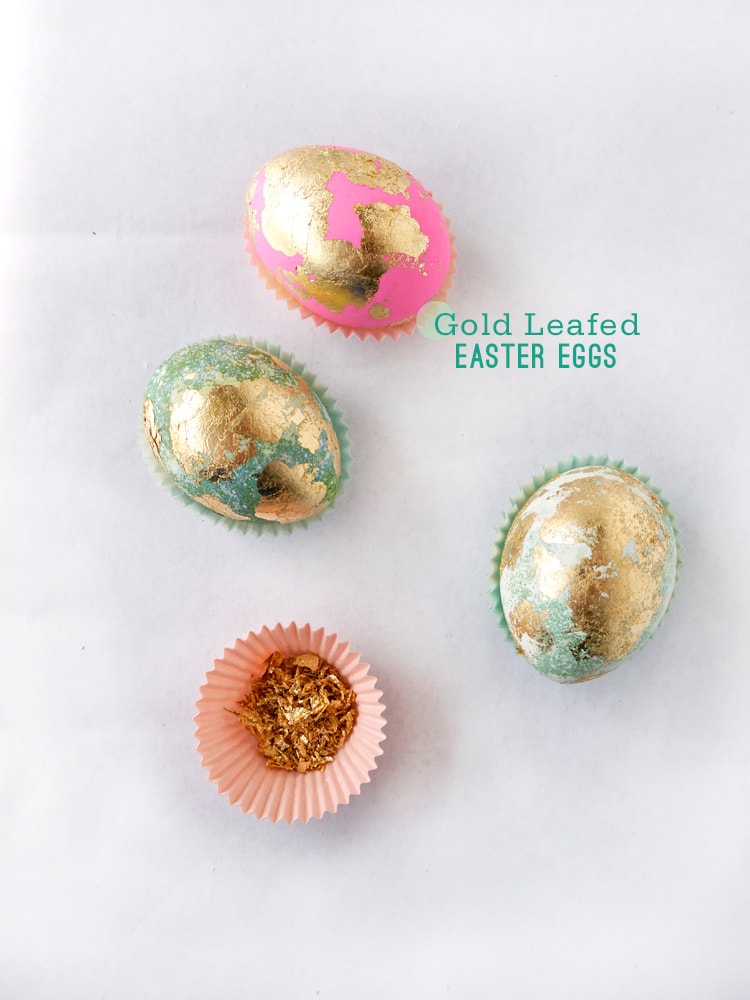
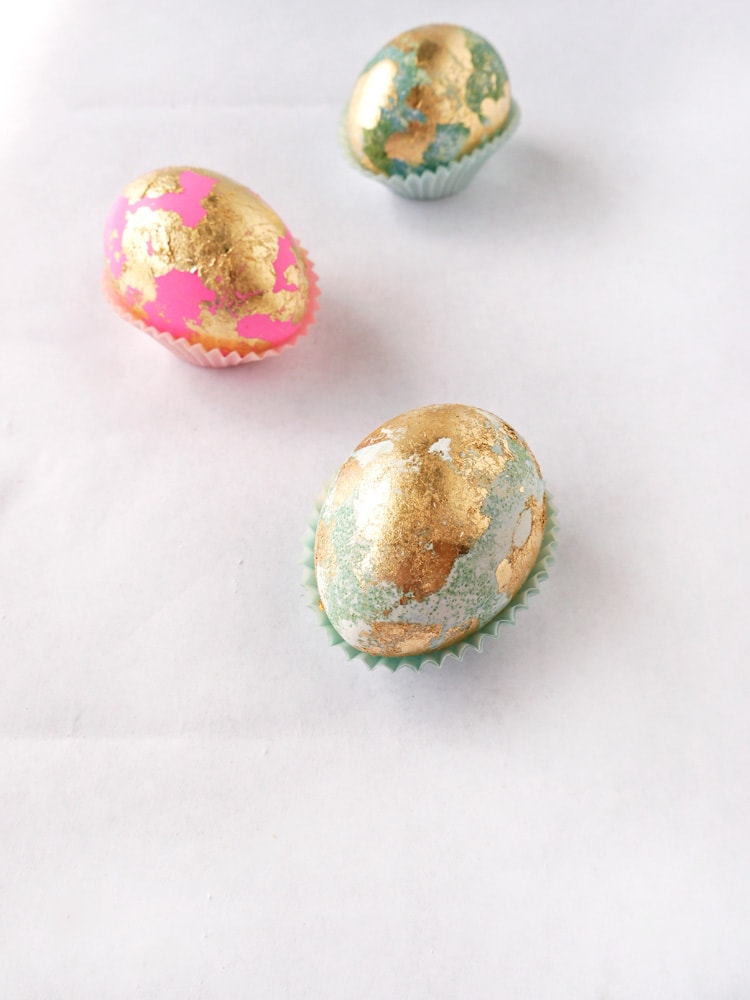
I've never gold leafed anything before in my entire life. So what compelled me to gold leaf Easter eggs this year? I can't really say, although I hoped that the end result would be half as fabulous as the golden eggs that live in my imagination. The good news is...they turned out even better and entirely unlike my imagination.
Golden, shiny and vibrantly colored, now that's a spin on the classic Easter egg! These were the sorts of thoughts going through my mind as I repeatedly dunked my Perfect Hard-boiled Eggs over and over again in their hot pink, blue, and green dyes. That night I smugly went off to bed, a dozen solid and freshly dyed eggs tucked away in the fridge for the morning. Are you getting the feeling that things went a little south? Well sure enough they did...
The next morning as I remove my eggs to come to room temperature I noticed that the previous night's dye job was a little less than perfect. Little condensation spots had formed, streaking and spotting my eggs. Not to worry, I thought, it's hardly noticeable. But as I sat watching my little colorful dozen sweat it out on the kitchen counter, those spots quickly turned into larger splotches and drips, eek! To make matters worse I began toweling them dry one at a time rubbing off more and more of their pretty coats. What I was left with was a hodge-podge of eggs with some serious character. (That's putting it nicely)
Let's face it, Easter eggs aren't supposed to be perfect! They're messy and speckled and really more fun to make than to look at. Had I forgotten this? After the eggs were dry and ready I started foiling my crazy eggs. Turns out the ugliest ducklings weren't ugly after all! In fact some of the most spotted eggs became the most beautiful once the foil was applied. My lesson had been learned. Decorating eggs is not a precise art; it's about having fun and making something unexpectedly beautiful. I hope you will gold leaf some eggs this year. You never know what sort of treasures await in your final product!
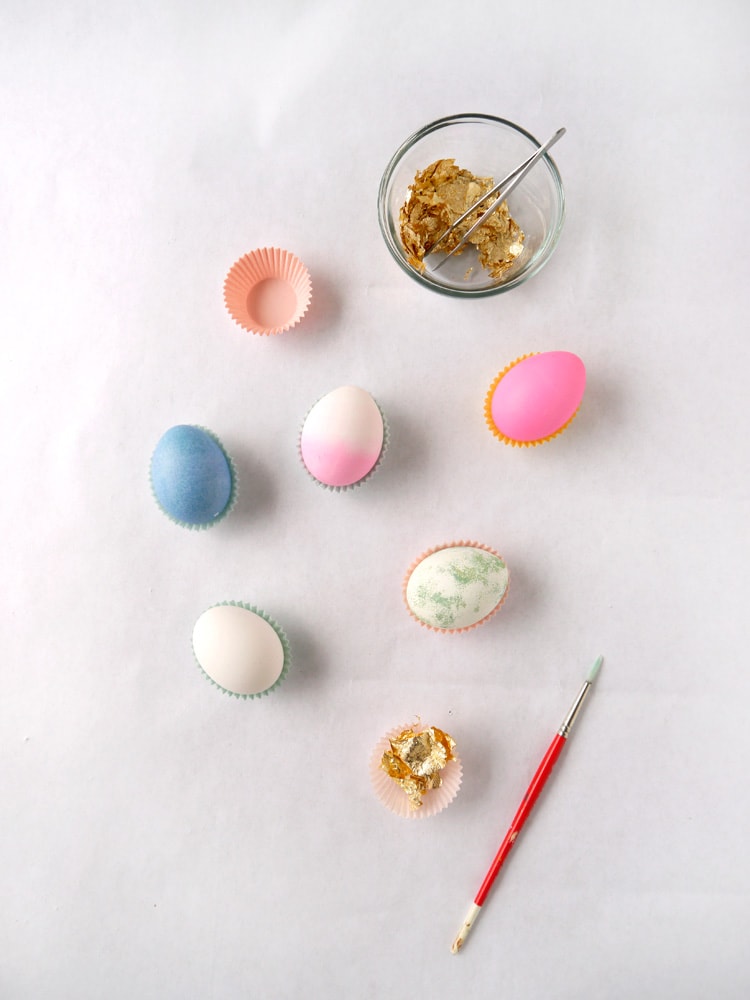
Supplies Needed:
Hard-boiled or blown eggs- dyed
Gold Leaf glue
Gold Leaf
A small paint brush
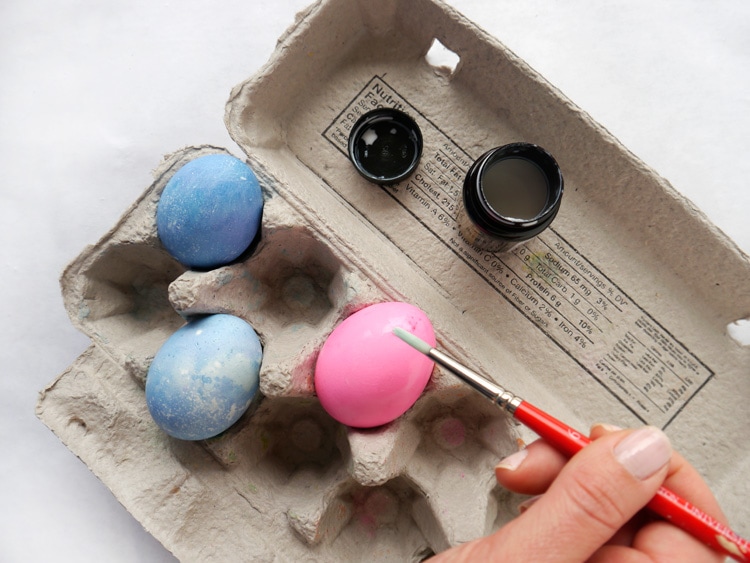
Step 1: With dry eggs, apply gold leaf foil glue in desired pattern and allow to dry completely. Glue will turn from milky white to clear and be very tacky to the touch but not wet.
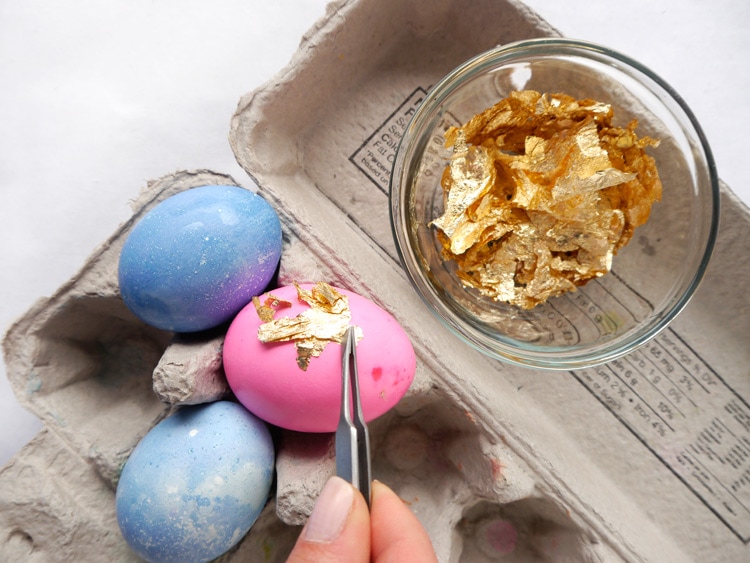
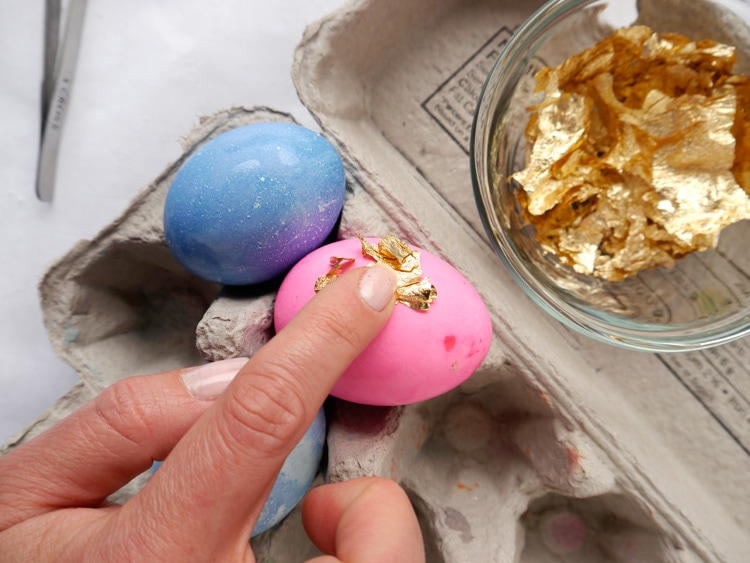
Step 2: With tweezers or fingers, apply pieces of gold leaf to dried glue.
Step 3: Press gold leaf down with fingers. Gently rub gold leaf to smooth and remove excess.
Step 4: When completely finished gently rub entire egg with a paper towel to remove any loose pieces of gold leaf.
Notes: Gold Leafed Easter Eggs are best used for decoration. These would make beautiful table decor for an Easter party or used as place card holders. Hide a few of these golden eggs in a scavenger hunt and the person who finds this golden egg wins a special prize! Happy Easter.
You can watch me demo making these Gold Leafed Easter Eggs live with Good Housekeeping right here on YouTube!


Christine says
Wowza. These have got to be the most beautiful easter eggs ever, they are so beautifully antiqued looking. I kinda wish they weren't eggs so they'd last forever!
Chelsea says
These eggs are seriously gorgeous! Great job girl, you're a homemaking force to be reckoned with.
Anouska says
Might have to try this for our Easter basket this year!
Jackie says
Good for you! I don't know if I have the patience for this. I probably would have gotten all upset and threw them out in the morning before even trying the gold leaf. I need to hire you on for help with Easter decorations!
xo Jackie
http://www.FoodWineFashion.com
Katie @ Strawberry Freckle says
I love these!!!!!!
Emily West (@sparklemeetspop) says
Those eggs got the royal treatment! Love it! I always liked decorating Easter eggs, but couldn't stand eating them for days afterward. 🙂
Emily | Sparkle Meets Pop
Melinda says
Wow! What a creative idea! Is gold leaf and gold leaf glue expensive? I like your story about egg dying--sometimes bloggers/pinterest can make everything look so easy, when it's really not! I appreciate your honesty! Cute post! 🙂
kw says
super gorgeous. way to make easter eggs totally chic
kw ladies in navy
Sarah {Hello Monday} says
these are absolutely stunning! Never seen a gold leafed egg before!
Lane Culpepper says
So beautiful! I want to gold leaf everything!
Lisa says
I bought some gold leaf recently with no use for it--thought it would be fun to gold leaf something, but wasn't sure what! Now I have a plan--can't wait to try this. Thanks for posting.
Amanda @ Once Upon a Recipe says
These are gorgeous!
Marisa M says
Thank you for the inspiration for beautiful Easter Eggs! I am not quite as talented when it comes to gold leafing-- but I was inspired by what you created and had to do something similar on my own blog!
Kathy says
Beautiful
Amber says
Those are beautiful! I have a suggestion to make them forever eggs next time. When i was a kid i was grounded and couldnt play with my friends. So out of boredom i took two eggs poked a hole on each end with a needle. Then I blew the egg yolk out the egg. Once I got the yolk out i rinsed the eggs and let them dry. Once they were dry I made two egg babies. Maybe this is something that can be done instead of hard boiling them. My mom still has my egg babies. I was about 8 when i made them and i am now 33.
Leah Bergman says
I haven't blown eggs in years! I agree that making "forever eggs" is a great idea. Thanks for the suggestion! 🙂