
As many of you know, this pregnancy has been a bit of roller coaster for me! Thankfully I have the greatest group of blogger girlfriends who will be stopping by from time to time over the next couple of weeks to help me out. If you missed last week's post by Jen, you must check it out. Next up, the ever lovely Chelsea from Lovely Indeed...
Hey there Freutcakers! Chelsea here from Lovely Indeed, super stoked to be stopping by while Leah is busy cooking her double batch of babes. And by the way, can we just take a moment to say how rad that is? Twins! Oh, it's gonna be so much fun.
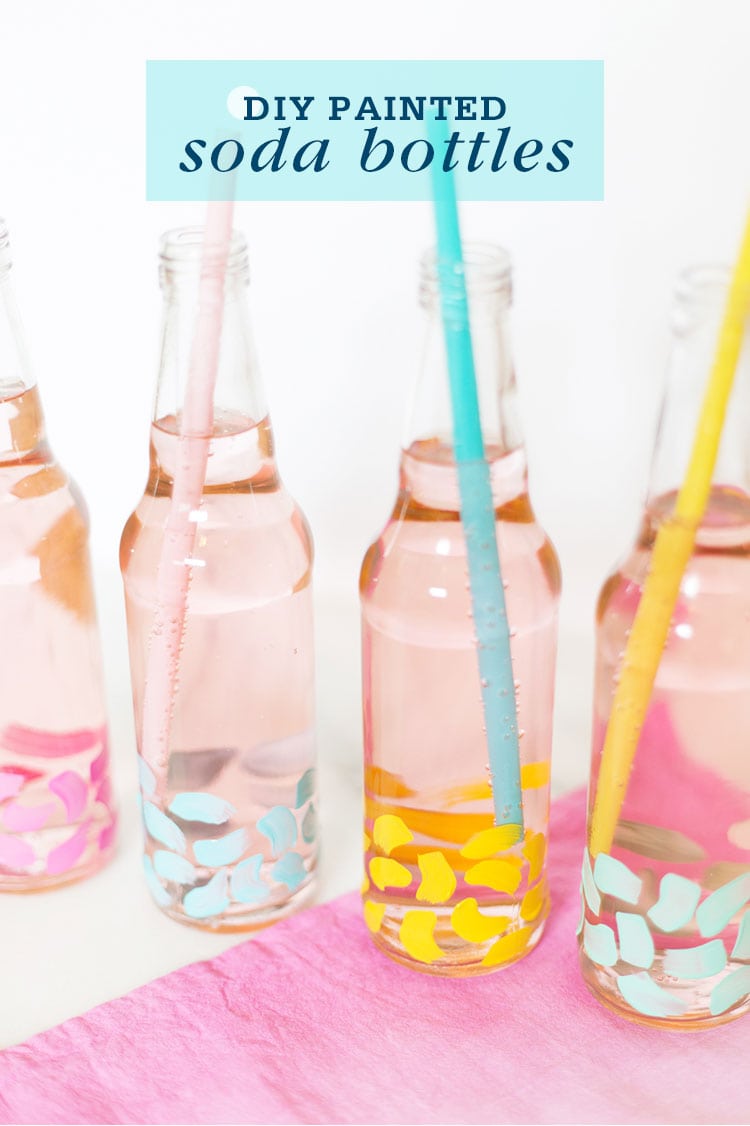
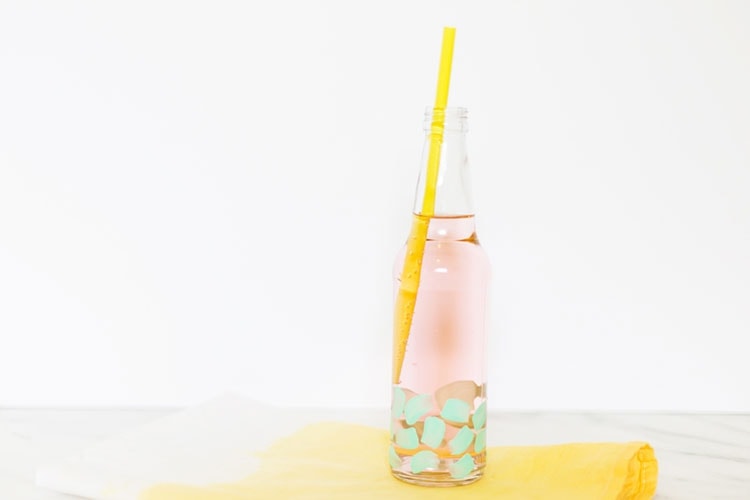
But let's get down to business, shall we? I've got a sweet little DIY today that you'll use all summer long. It's beyond simple and totally fun -- DIY painted brushstroke soda bottles! And the best part is they're totally customizable. Pick your favorite colors and your favorite patterns, or make some just like ours. You can't go wrong!
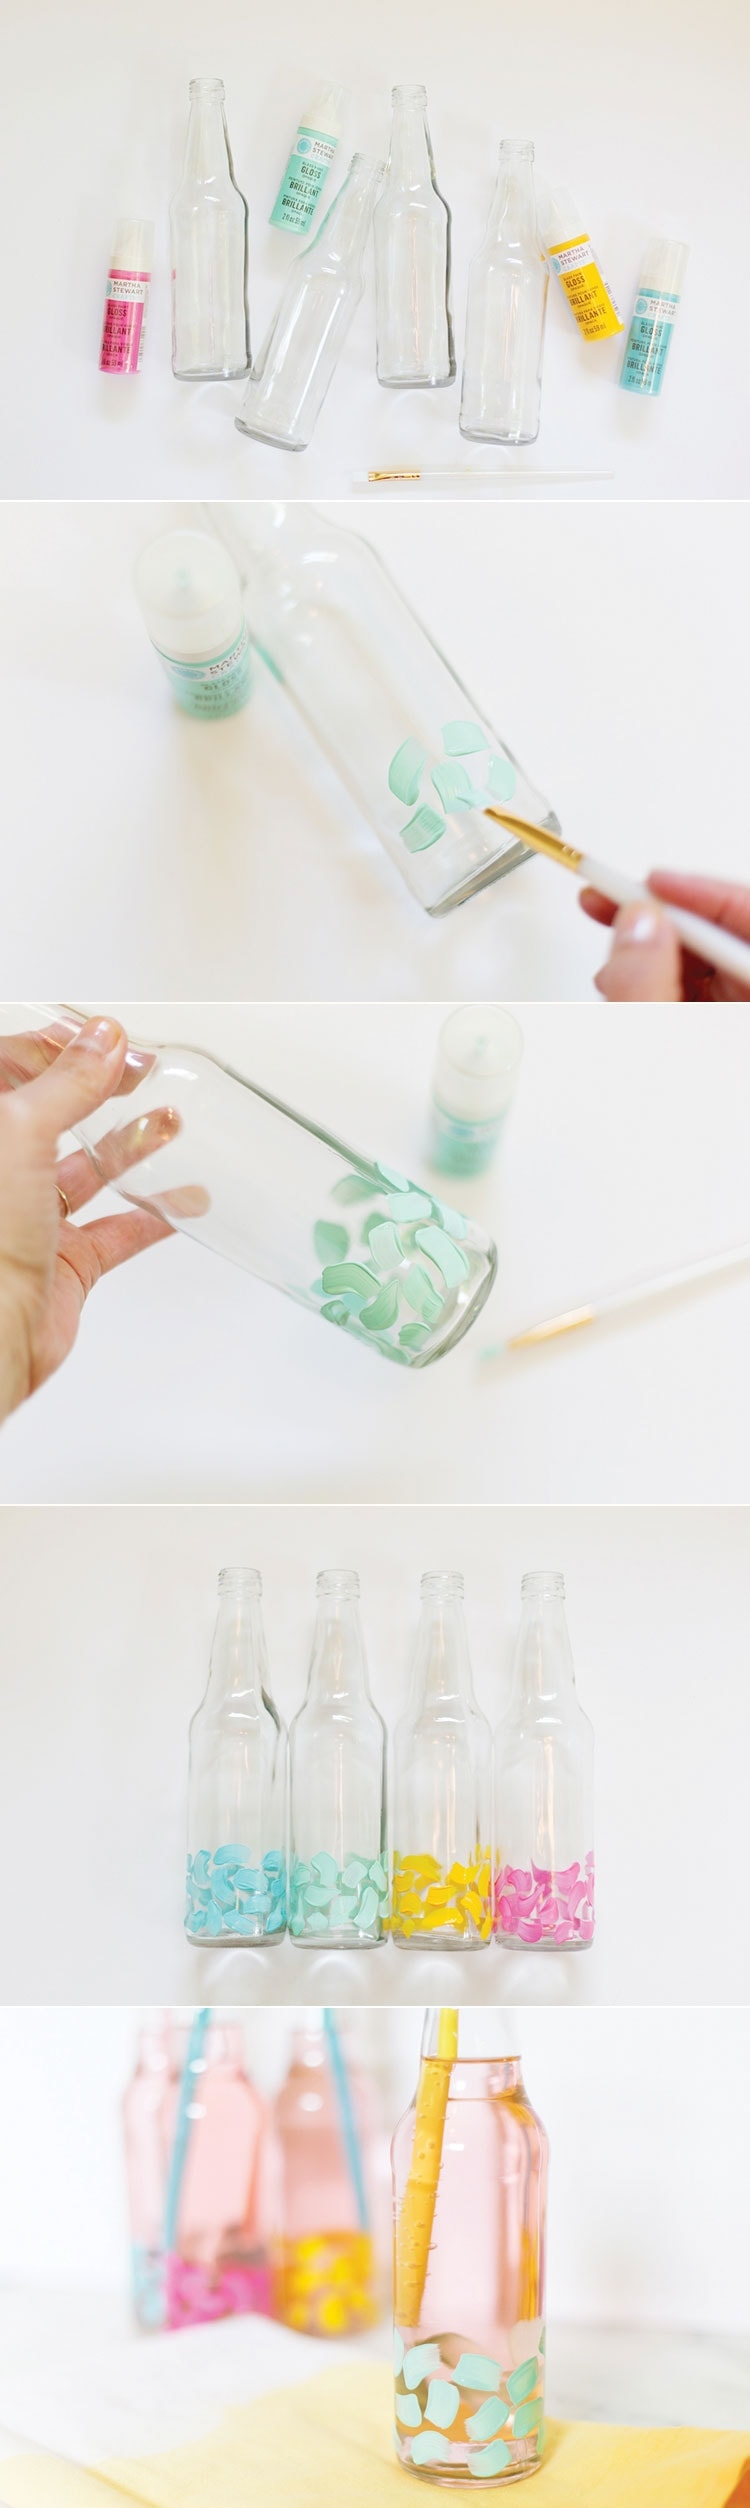
Materials:
plain glass soda bottles (we found ours at Michaels)
glass paint
paintbrush
optional: oven
Directions:
1. Wash and dry your bottles thoroughly to be sure the surfaces are clean and dry.
2. Paint on your pattern! To get our brushstroke look, dip your brush in paint and start your stroke with firm pressure, then give it a flick and lift your brush off the glass at the end of the stroke. Probably best to practice on some scratch paper first. Fill the lower area of the bottle with the pattern.
3. Allow the paint to dry thoroughly.
4. Follow the instructions on your glass paint packaging for curing. If you're using the Martha Stewart brand, place your bottles inside a cool oven. Turn the oven on to 350 and leave on for 30 minutes. Turn oven off but leave bottles inside until the oven and bottles are completely cool. (Alternatively, you can set the bottles aside for 21 days while they cure. But we don't have the patience for that.)
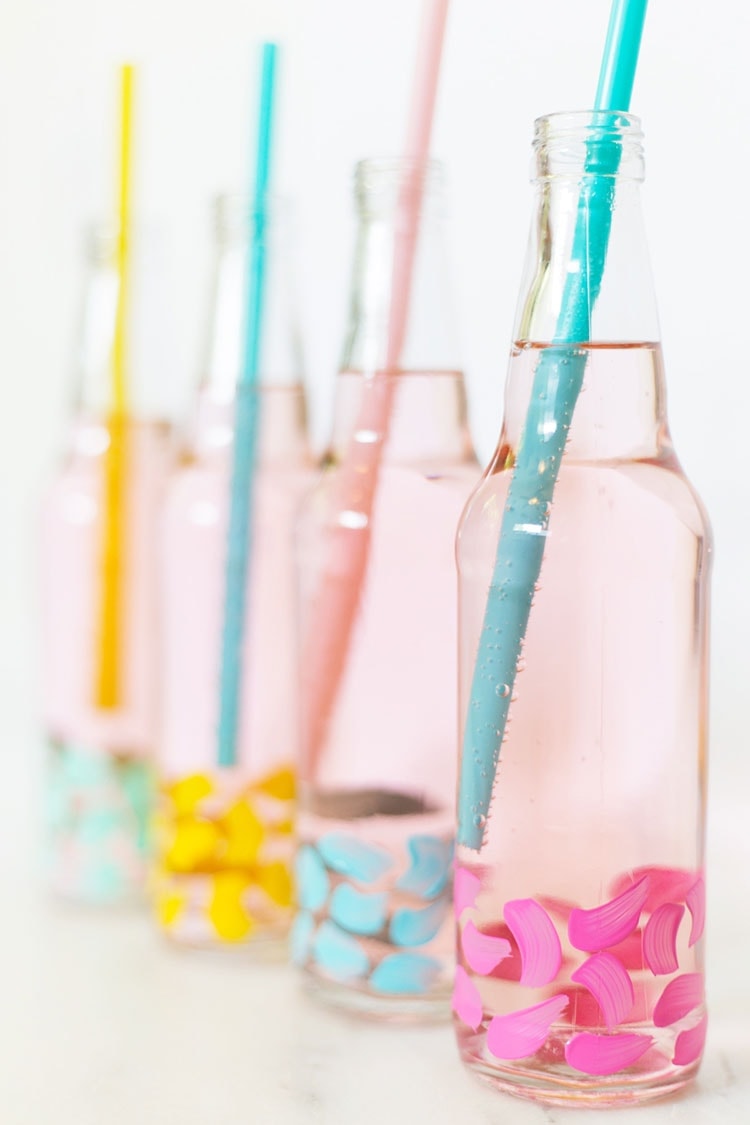
That's it! Fill up your bottles with some pretty, fruity sodas and pop in a colorful straw for a few sips. These would be perfect for your summer soirees, or just for sipping your favorite lemonade on a warm day. Cheers!
photos & tutorial by Lovely Indeed
A big thank you to Chelsea for this fabulously fun tutorial. What do you think? Will you be painting soda bottles this summer? I can't help but thing that this would be the PERFECT craft for a baby shower. Wink, wink. - Leah
ursularosien says
Pinned! Adorable and it looks fairly easy to do! My kind of craft 😉
Leah Bergman says
My kind of DIY as well! I love a simple craft. xo
writingmonique says
Ah! I love these cute, easy crafts! Totally my style! Love this idea!
WritingMonique
Katy says
Very cute! Love that these can be customized for any party theme. We added one picture with a link to your Blog to our Inspiration section over at Blitsy. We'd love for you to add more ideas there! https://blitsy.com/inspiration