
"Meet Marisa, Freutcake's newest DIY Contributor! Marisa and I are not only friends, we also have a whole lot in common when it comes to our love for coffee, graphic design, and DIY. That is why I am so excited to have Marisa sharing her crafty talents as our new DIY lady. I never thought I would say it but...these spiders are adorable!" - Leah
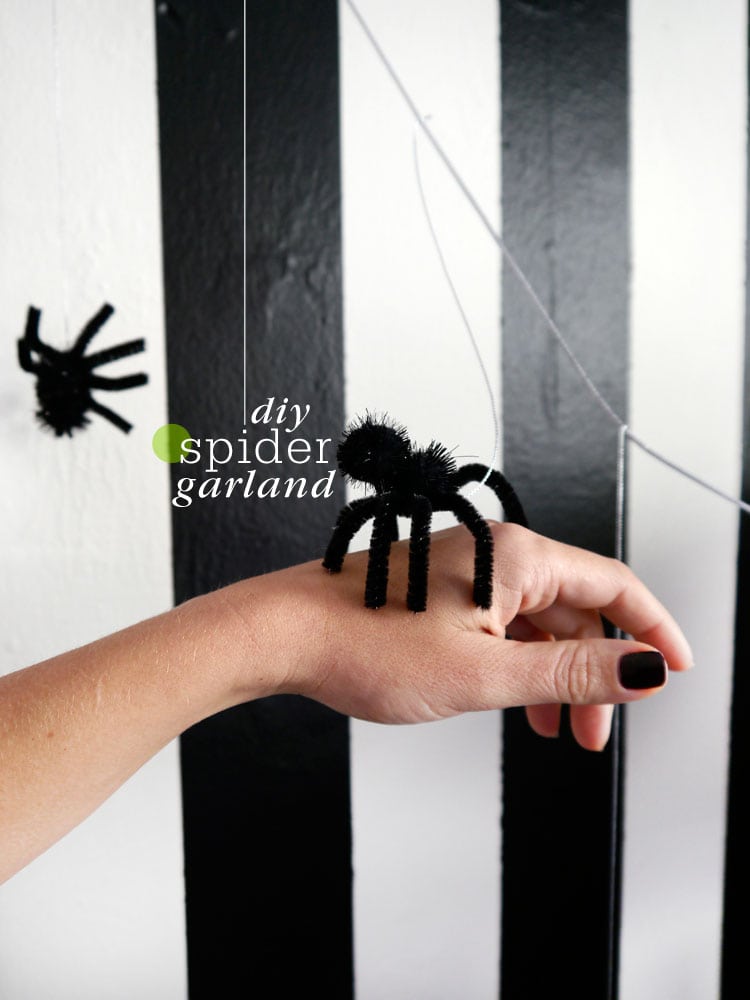
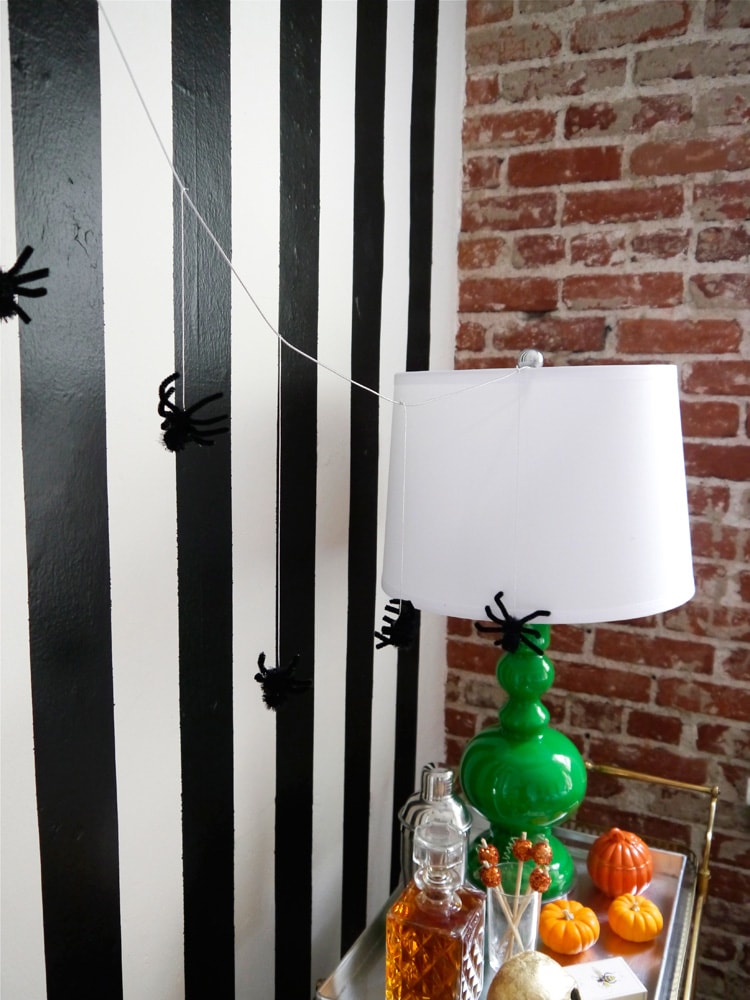
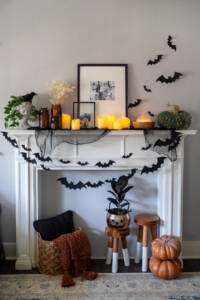
Decorating for the Halloween season doesn’t have to be all blood & gore. If you’re looking for an easy way to bring some Halloween spook to your home while maintaining some form of cuteness, this little spider garland is the perfect DIY project for you! We’re all about keeping it classy & sparkly around here at all times. But given that it’s Halloween time, we thought we’d add something a little more creepy to the DIY mix. Warning: these cut little spiders might make you jump when you walk by!
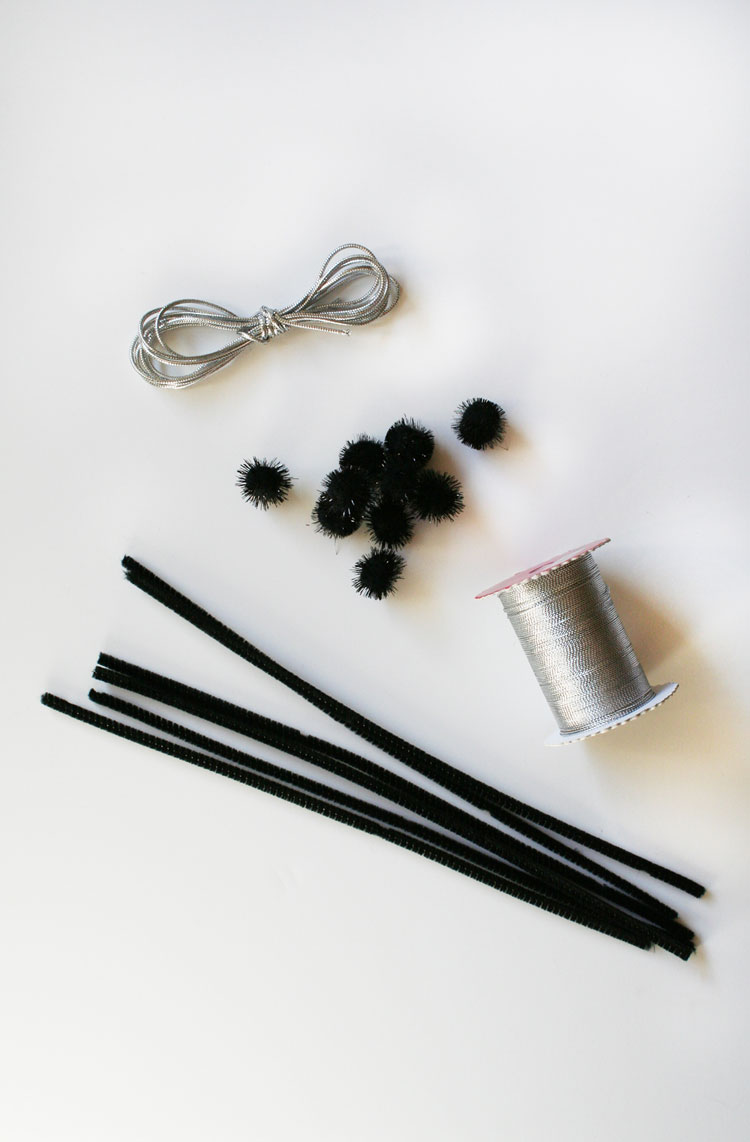
Here's what you need to make this DIY Spider Garland...
Supplies:
Thick metallic silver cord
Thin metallic silver cord or string
Black sparkle pom poms
Black pipe cleaners
Scissors
Hot glue gun
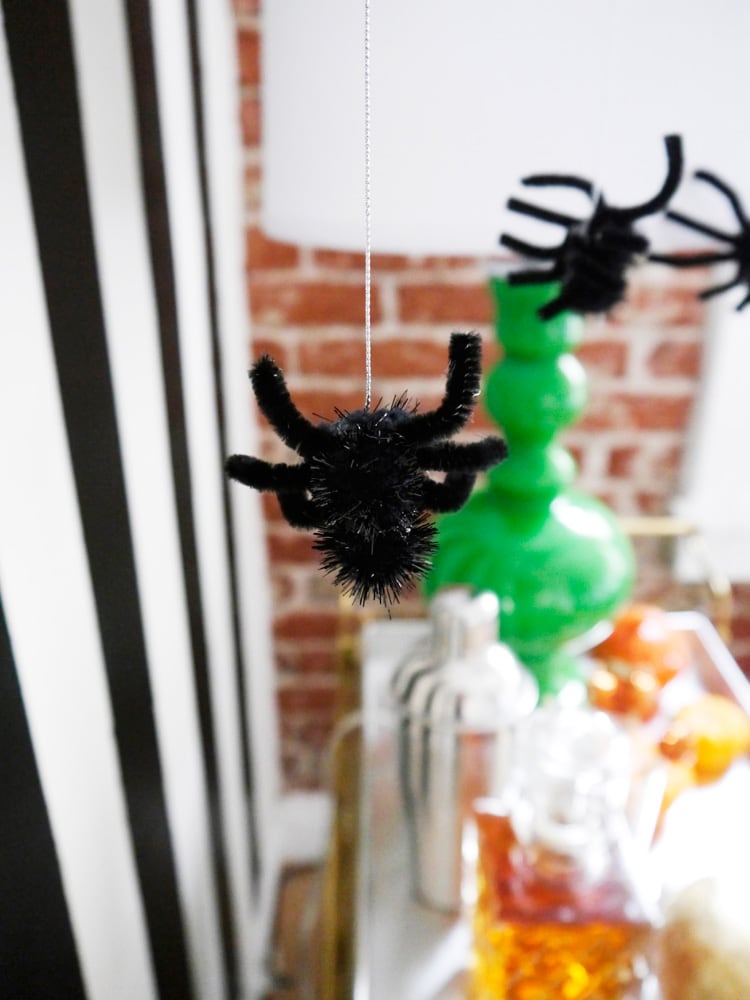
Step 1: Cut your pipe cleaners into 2 inch & 1.5 inch lengths. These are going to be your spider’s legs. Each spider will need six 2 inch legs & two 1.5 inch legs.
Step 2: Add a large dot of hot glue on one pom pom.
Step 3: Moving quickly, attach the legs to the glue before it cools & dries. Be sure to keep the two 1.5 inch legs next to each other, as these will be the front legs of the spider. Set aside & let dry for a couple of minutes.
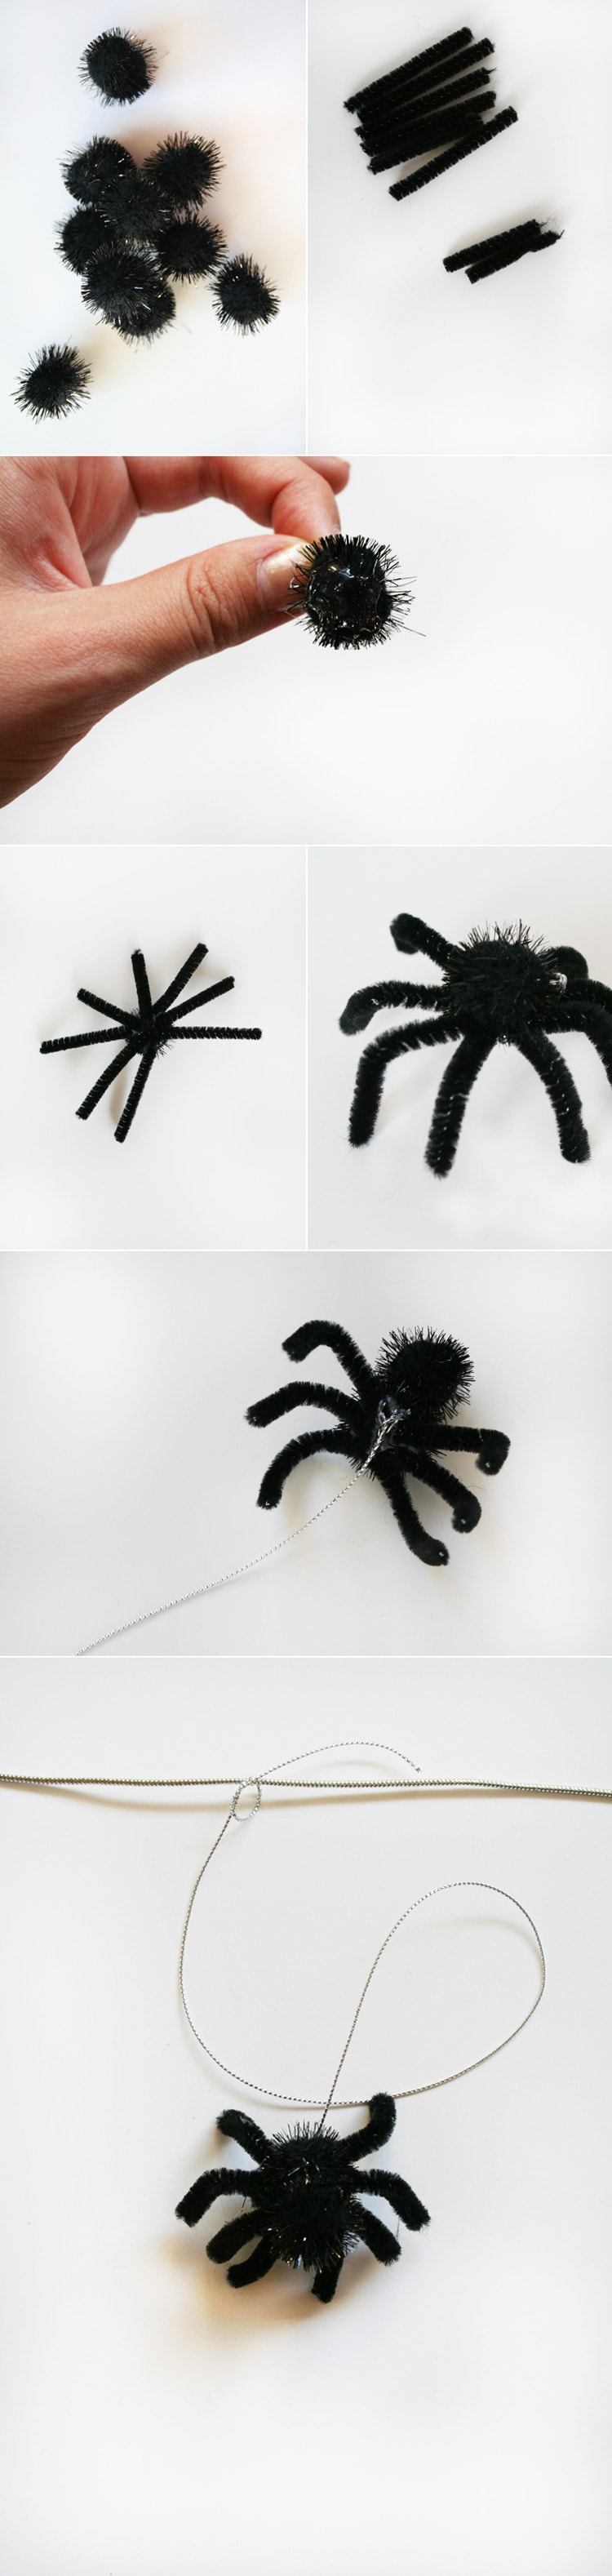
Step 4: Turn the spider right side up & bend all of the legs downward, adjusting them so that they look even & support the body.
Step 5: Add a smaller dot of hot glue to the top of the body where you would like the head and attached a second pom.
Step 6: Cut the thin silver cord into varying lengths (ours vary from 8 inches to about 14 inches). Attach to the underbelly of each spider with a small dot of hot glue.
Step 7: Cut the thick metallic cord to your preferred length & attach each spider’s thin cord to it with a knot. Cut down the excess string at the top of your knot. Hang and enjoy!
DIY photos by Marisa Mangum // Garland photos by Leah Bergman


Tammy Thiele says
Adorable! Welcome to Marisa!
Kelsie Coray says
Nice job Marisa! "Cute" spiders too! Lol
Chelsea says
I can't wait to see what Marisa has up her sleeve. This little spider garland is too cute!
xoxo,
Chelsea & The City
Luv and Kiwi says
Your spidey senses are grand.
Erin Phraner (@erinphraner) says
Can't wait to read more of your posts, Marisa! LOVE this DIY xo
Petra says
What a cute diy.
xo, Petra
http://www.sweetsoflife86.blogspot.com
ChristmasKitty says
Welcome Marisa! What a great Halloween DIY. I love the way you did something with spiders that isn't gloomy or scary. This is just right!
Debi says
These are very cute and what else you can do is to use gumballs instead of the pompom. Also you can use bumpy chenille for the legs, then I put a pin and you can pin them anywhere on a person. They turn out very cute also. They actually look real. I love yours on the metallic string also. Great idea