Salt Dough Ornaments are a beautiful way to decorate your Christmas tree with handmade ornaments that only require a few simple ingredients. Kids will love the tradition of making salt dough ornaments to give as gifts or hang on your family Christmas tree. This is a classic salt dough recipe I've been making for years!
Classic Salt Dough Ornaments
Do you remember making salt dough ornaments in grade school? I think I still have one of those childhood ornaments packed away in the bottom of my Christmas decorations...probably a bit crumbly by now! This year I decided to make mini star salt dough ornaments just for the nostalgia of it all. It's fun and a little bit magical to do things that remind you of being young, isn't it? Whether you're making these ornaments with kids or or not, this project couldn't be easier!
Ingredients for Salt Dough Ornaments
- All Purpose Flour - all purpose white flour gives a smooth texture and white color to the ornaments.
- Salt - table salt works best for salt dough.
- Water
- Food coloring (optional) - you can use either gel or liquid food coloring for this.
How to Make Salt Dough Ornaments
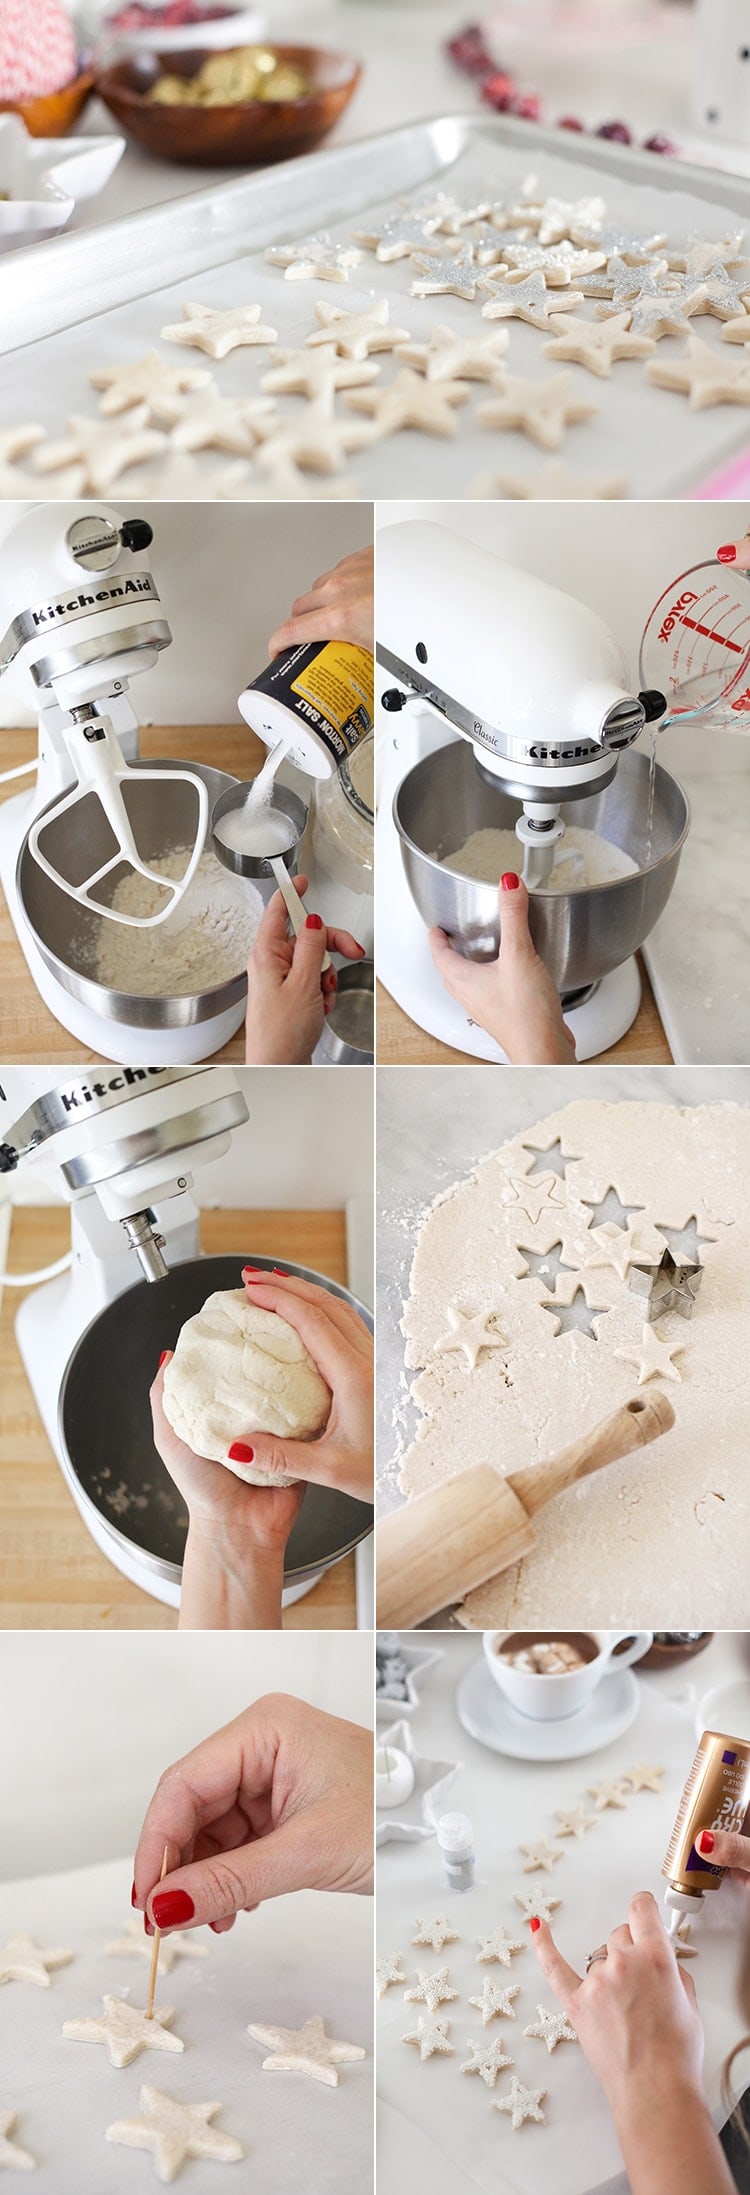
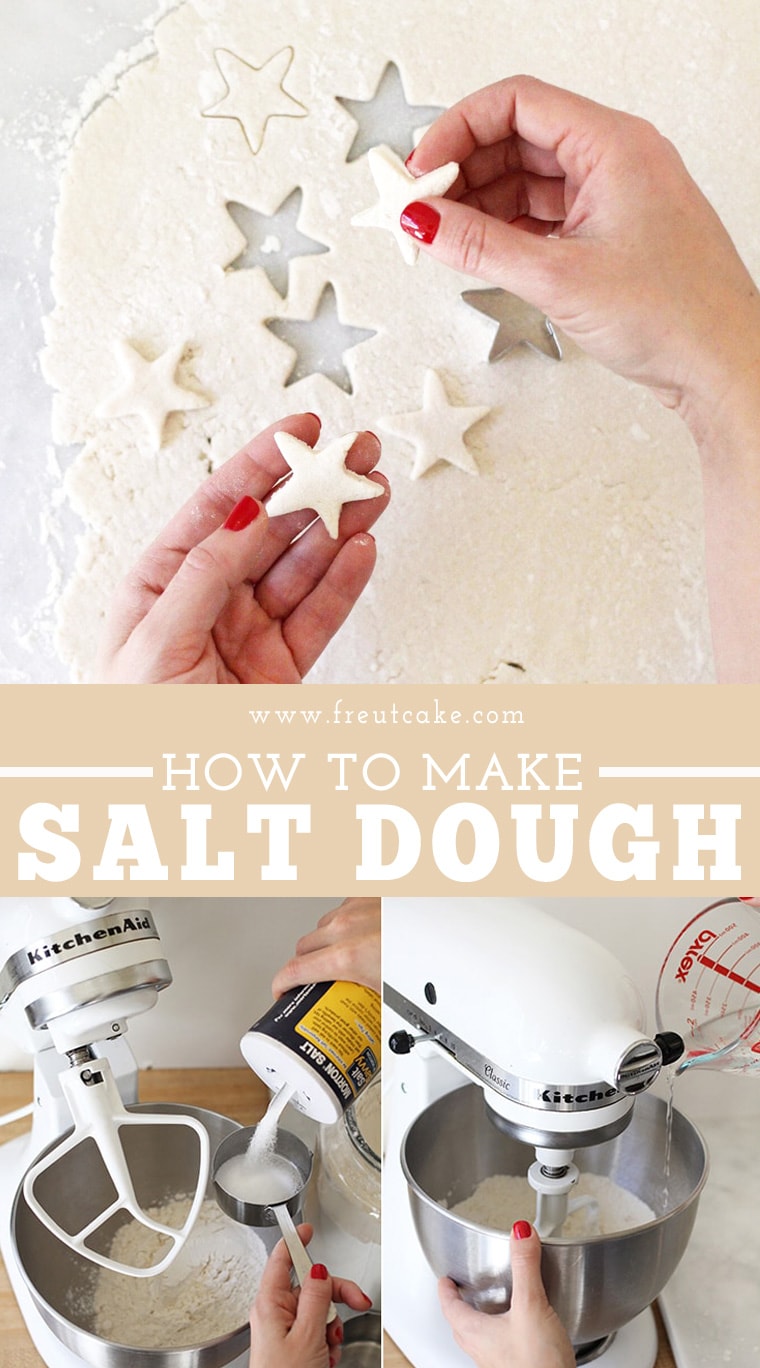
- Preheat the oven to 300 degrees and line a few baking sheets with parchment paper.
- In an electric mixer combine flour and salt and mix well.
- With the mixer on low speed add in the water slowly until dough comes together in a ball. You may need as little as ½ cup of water or as much as 1 cup so pour slowly and stop when the dough comes together and feels like cookie dough.
- Wrap in plastic wrap and refrigerate for about 10 minutes to firm up.
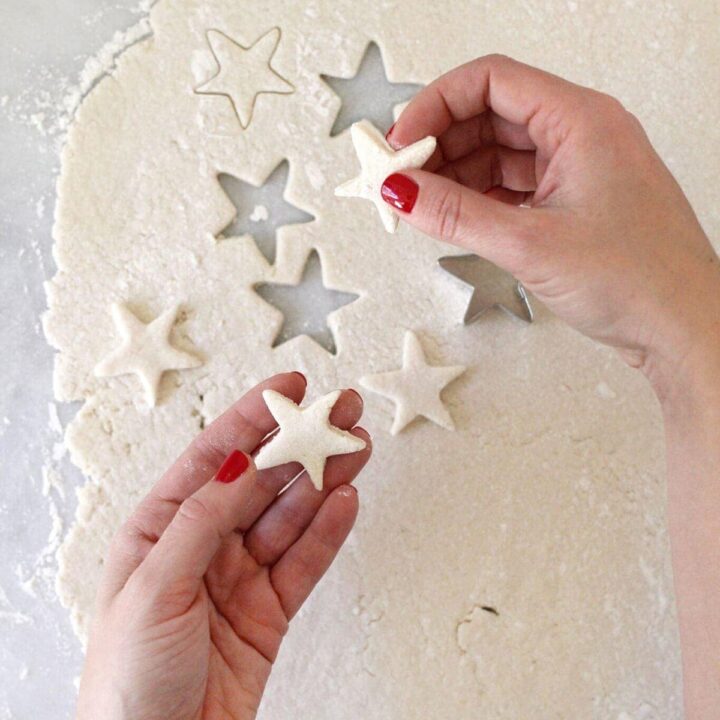
- On a very well floured board, roll dough out to ¼" thick. Cut out ornament shapes using various cookie cutters. I used a small star cookie cutter.
- Transfer ornaments to prepared cookie sheets and poke a small hole in each using a toothpick. Make hole large enough for an ornament hook or ribbon.
- Bake for 30 minutes. The ornaments should only harden but not brown.
How to Color Salt Dough
If you want to color your ornaments, add food coloring to the water in step 3 before mixing it into the flour and salt. Adding food coloring to the dough will result in splotchy ornaments.
How to Decorate Salt Dough Ornaments
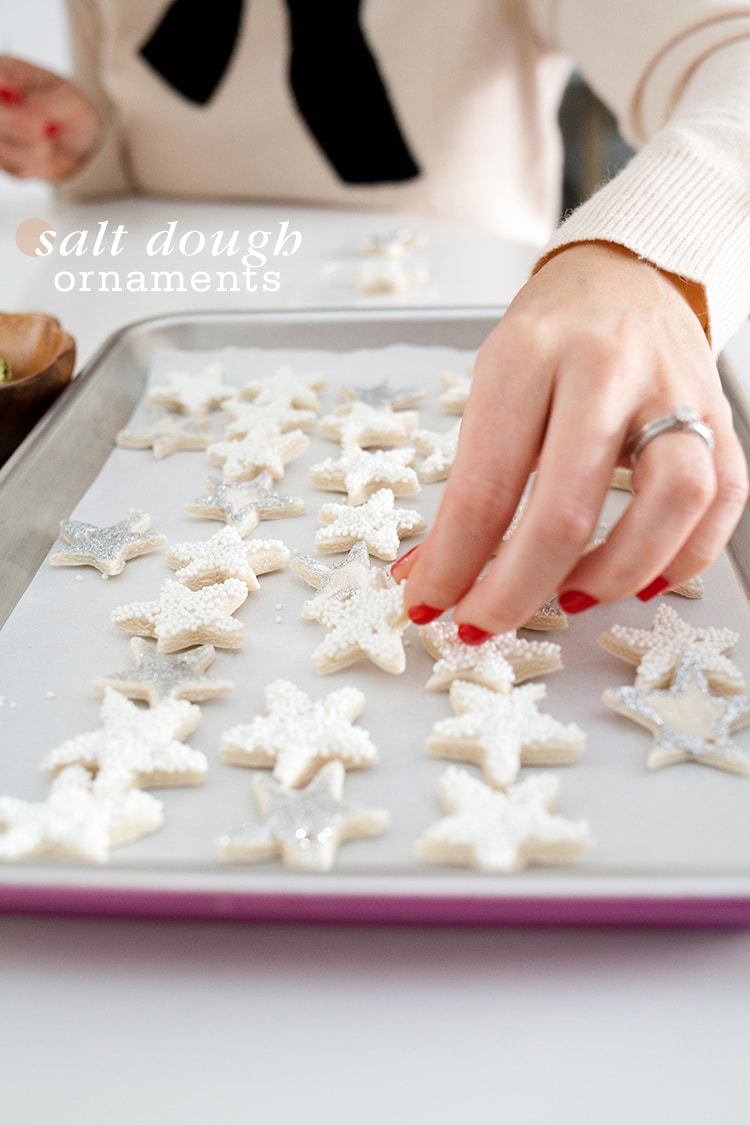
- Apply white craft glue to the front side of your ornaments.
- Dip in glitter, nonpareil, sequins or beads.
- Allow to dry completely before hanging.
Looking for More Christmas Craft & Decor Inspiration? You Might Like…
- Our Pine Tree Inspired Christmas Kitchen Decor
- 10 Handmade Ornaments to Make
- A Woodsy Green and Plaid Christmas Tree
- How to Make Gingerbread Playdough
How to Make Salt Dough Ornaments
Classic Salt Dough Recipe for Ornament Making
Ingredients
- 2 cups all purpose flour- plus more for the board
- ½ cup salt
- ¾ – 1 cup water (you may need less)
- food coloring (optional)
Instructions
1. Preheat the oven to 300 degrees and line a few baking sheets with parchment paper.
2. In an electric mixer combine flour and salt and mix well.
3. With the mixer on low speed add in the water slowly until dough comes together in a ball. You may need as little as ½ cup of water or as much as 1 cup so pour slowly and stop when the dough comes together and feels like cookie dough.
4. Wrap in plastic wrap and refrigerate for about 10 minutes to firm up.
5. On a very well floured board, roll dough out to ¼″ thick. Cut out ornament shapes using various cookie cutters. I used a small star cookie cutter.
6. Transfer ornaments to prepared cookie sheets and poke a small hole in each using a toothpick. Make hole large enough for an ornament hook or ribbon.
7. Bake for 30 minutes. The ornaments should only harden but not brown.
Notes
Optional Colored Dough:
If you want to color your ornaments, add food coloring to the water in step 3 before mixing it into the flour and salt. Adding food coloring to the dough will result in splotchy ornaments.
To Decorate:
1. Apply white craft glue to the front side of your ornaments.
2. Dip in glitter, nonpareil, sequins or beads.
3. Allow to dry completely before hanging.






Jacquelyn | lark & linen says
This just brought back SO many memories! I'm kind of thinking I need to make them again...
Chelsea says
This looks like such a fun project Leah... definitely something Lo and I could do together!
Marisa says
love this! such a cute project and pretty easy too 🙂
Victoria | Oh So Pretty says
Oh yes, I totally remember this - but mine never looked this good.. it was always splashed with way too much food coloring 🙂 So beautiful - will have to do this!
Patricia Goijens says
Oh my, I hadn't thought about this in years! Yours look prettier than the ones I made once upon a time though! 🙂
Kalley Boehmer says
Anybody have suggestions to remove these kind off ontaments off of a non sprayed cookie sheet? They are stuck on my pan after cooking
Fluffy kitten says
This is so cute!!!! I am selling these in trep$ at my school and you have a great recipe! Yours definitely look better than mine will though... I have a question... Can you use marker and paint on these? Thank you! I love your ideas!:)
denise says
can they be painted with names on them or can you use shellac on them to make them shiny?
Emi says
Hi, can we use oven toaster instead?
Leah Bergman says
Sorry, I'm not sure if you can bake these in a toaster oven. I have never tried!
Tresa says
Am doing this as I'm writing pretty simple and kids will love them
Erica says
Mine came out hard on the outside but puffed up a bit after cooking more than 15, almost as if there was air inside. Any thoughts on how I might have possibly messed these up?? Super cute otherwise!! Thanks!
Leah Bergman says
That is strange! You can try flipping them over half way through baking and that should help.
Erica says
To clarify, after cooking 15 minutes extra (45 mins in total!) Thank you again! 🙂
Leah Bergman says
I would bake for 15 minutes, flip them then bake the additional 15 or 30 minutes if needed! If after 15 minutes (on the second side) they are puffing up again, flip them back a second time. There is really no wrong way to do it. You just want them to completely harden/dry out. If you need to, poke a small hole in the bubble if it starts to puff up while baking before flipping. Also, make sure you are poking the hole in the ornaments before baking. I hope this helps!
Erica says
Perfect! The bottom is hard so I bet flipping it will help. Thank you! Batch 2 going in now! 🙂
Leah Bergman says
Fingers crossed!
paola says
Can these be painted?
Leah Bergman says
Yes! You can paint or glitter them after they cool completely.
homeschoolapalooza says
This is so cute!!! Also, wanted to let you know that there is a link party on Wednesdays at my blog - would love to see you there!! http://homeschoolapalooza.wordpress.com
Rey says
Will these eventually rot and turn rancid?
Leah Bergman says
They won't turn rancid because there is no oil in the ornaments. They may begin to crumble a bit after time but it would probably take years. They do not mold or rot in my experience.
Kathryn says
I plan on making these today - thanks! But about how many ornaments does this recipe yield?
Leah Bergman says
It's hard to say because it depends on how large you plan to make them. I used a small 1" star cookie cutter and it made about 3 dozen.
Sophie says
This recipe is perfect. I made this dough for ornaments for my students to paint. We used watercolors and they turned out beautiful. Thank you!
amanda lawson says
Mine came out brown! What did I do wrong?
Leah Bergman says
I would try cutting down the baking time. Just keep an eye on them and pull them out when they are dry and hardened.
Monica says
Your salt dough ornaments turned out gorgeous!
Gina says
Thanks for sharing! I would ideally like to flood coat these with a paint that looks like tinted royal icing. Any ideas???
Leah Bergman says
I would use white mod podge tinted with food coloring!
Gina says
Isn't mod podge clear though? I guess I could add some kind of acrylic? I will go to Michaels and pick their brain. I love how yours turned out. I could cover a whole tree with these!
Leah Bergman says
I believe mod podge has a white (not translucent) product as well! Have fun crafting!